Drawing with Paint

It’s about time I made a new entry in my blog. I’ve had the new art for a while but, for many reasons (my recurring head pain for one: see earlier entry) I haven’t gotten around to putting it up.
Last week I had to get a couple of fairly finished looking cover sketches done so, just to make it more fun, I decided to do it in a different way than I’ve done in the past.
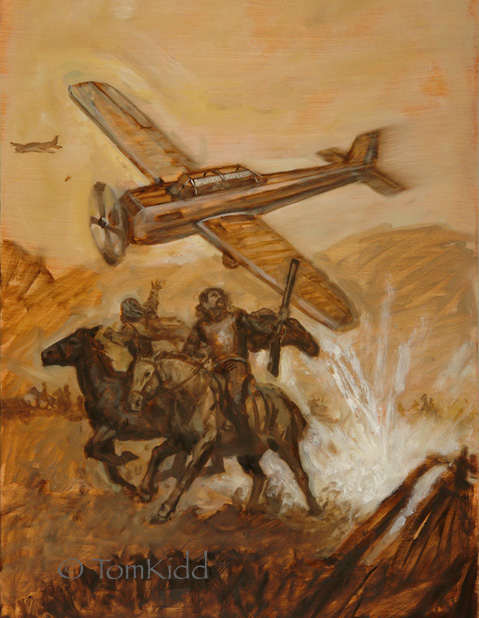
First I’ll explain how I typically work: rather than draw with a pencil or transfer a drawing over to my painting surface I just redraw it with paint. Paint is great to draw with. It has a great deal more flexibility than a pencil has. Typically I can block in the composition quickly with umber and begin painting in color. It helps to put a thin layer of medium on the surface before drawpainting (I’ve coined a word) because it helps the paint flow. If you want to erase a section you’ve painted a rag dampened with linseed oil works nicely.
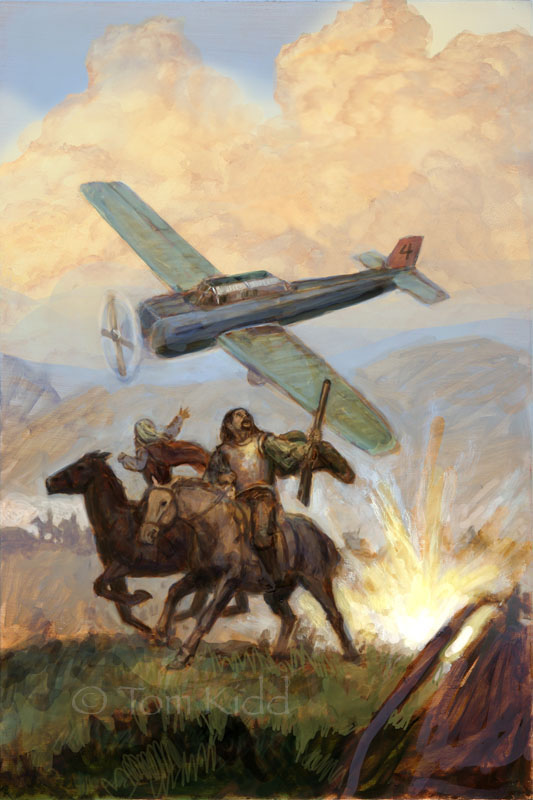
The new thing I decided to do was take the drawpainting a little further than I normally do, take a digital photograph of it and tint it in Photoshop. I know illustrators who do entire oil paintings this way. My friend Abe Echevarria who studied with the famous illustrator Morton Roberts learned this glazing approach from him. At top is the first step of my umber/sienna drawing. Almost all of this will be obscured when I go to finish the painting. Normally I’d paint into it with color while it’s still wet. As long as the basic forms are there I don’t mind losing my drawing. Anything I drew once I can draw again.

Above is the second step done digitally. I cheated on the clouds by importing some clouds from an older painting I did.
Note: Not long ago I bought a nice digital camera just for taking pictures of my paintings. It allows me to take high-resolution pictures at a size publishers can use. Even when a publisher needs something a little larger I can shoot two halves of a painting and seam it together in Photoshop for a much larger file.
PS: Of minor interest, I’m posting this from a new computer, a MacBook. It’s a test to see if I can do this stuff on the road and to play with a new toy.


6 Comments:
I actually like the way the umber looks. It really gives it a vintage feel. The plane looks like a baseball bat.
It's a wooden airplane. This is an alternate history story. It takes place in 1634. When I post the actual finished painting I'll give more information on that.
One reason I don't usually go into that much detail in my underpainting is that I hate to obscure it later. As I'm painting this I'm keeping the color somewhat more harmonic, not quite what you see here in the second version. I've never been able to color within the lines, even my own.
Underpainting directly with *watercolor* is NOT as easy as pencil I would have to say... I always think that painting in oils looks incredibly appealing (I haven't painted with them really since college), but I never seem to get enough self-experimentation time to really immerse myself. In the meantime, I shall continue to paint with the less-forgiving, but unpredictably interesing watercolor apparently!
Cool approach. I've toyed with all kinds of variations on starting things traditionally then importing and working on them digitally when it works it works....
Wonderful update Tom.
The detailed underpainting and then color study in PS technique is something I was talking to Dan Dos Santos about a lot lately. He uses it quite a bit in his work, and I think it's a great way to free yourself to experimentation.
It was great meeting you this weekend at Lunacon, however briefly. Have the headaches subsided?
great work
:D:D:D
Post a Comment
<< Home